

-

-

-
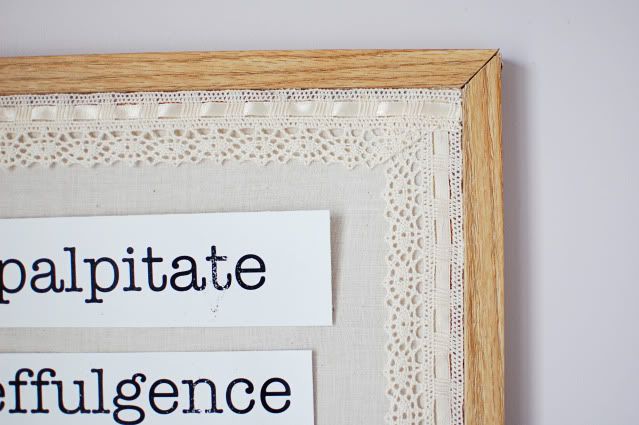
I've had a basic bulletin board above my desk for about a year now, but ever since I hung it up, I've been wanting to fix it up a bit. It looked a bit too blah and classroom-like for my taste. And so I decided to cover it up with some fabric. The process was much easier and hassle-free than I expected it to be, and it turned out quite lovely. Other than gathering the supplies, I'd say the whole thing only took about 20 minutes.
I used this tutorial as a guideline, but this is how I did it:
Materials: a piece of fabric large enough to cover the cork (I used some extra white linen I had from another project), fabric sheers or scissors, masking tape, spray adhesive, a piece of ribbon or trim long enough to cover the border of the cork, and hot glue or tacky glue
1. Cut out a piece of pre-washed material to fit the interior of your bulletin board. The piece of fabric should fit right up to the frame, but not past the frame. If it's not perfect, that's alright. The ribbon will cover up the inconsistencies.
2. Iron the material, if needed.
3. Using the masking tape, tape off the frame of the bulletin board so that you do not spray any adhesive on the frame.
4. With your material ready and on hand, spray the cork with the spray adhesive and immediately apply the material onto the board. Flatten out any wrinkles while the adhesive is still wet.
5. Once the adhesive is dry, cut out lengths of the ribbon or trim to fit the four sides of the bulletin board. Using hot glue or tacky glue (I found hot glue worked better), attach the ribbon or trim along the edges, within the frame.
And that's it! You could also paint the frame of the bulletin board before doing this, if you didn't like the coloring of the frame. And while I wanted something sort of understated and plain, there are endless possibilities with patterned fabrics or bolder colors.
-
I used this tutorial as a guideline, but this is how I did it:
Materials: a piece of fabric large enough to cover the cork (I used some extra white linen I had from another project), fabric sheers or scissors, masking tape, spray adhesive, a piece of ribbon or trim long enough to cover the border of the cork, and hot glue or tacky glue
1. Cut out a piece of pre-washed material to fit the interior of your bulletin board. The piece of fabric should fit right up to the frame, but not past the frame. If it's not perfect, that's alright. The ribbon will cover up the inconsistencies.
2. Iron the material, if needed.
3. Using the masking tape, tape off the frame of the bulletin board so that you do not spray any adhesive on the frame.
4. With your material ready and on hand, spray the cork with the spray adhesive and immediately apply the material onto the board. Flatten out any wrinkles while the adhesive is still wet.
5. Once the adhesive is dry, cut out lengths of the ribbon or trim to fit the four sides of the bulletin board. Using hot glue or tacky glue (I found hot glue worked better), attach the ribbon or trim along the edges, within the frame.
And that's it! You could also paint the frame of the bulletin board before doing this, if you didn't like the coloring of the frame. And while I wanted something sort of understated and plain, there are endless possibilities with patterned fabrics or bolder colors.
-


